Roast note: Burman Colombian Las Montanas EA Natural Process

Comments

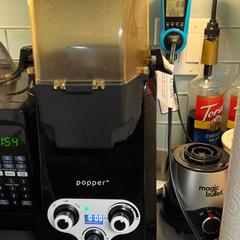
I finally tried out a roast I’d been looking forward to, a medium-light roast of Burman Colombian Las Montanas, an EA-decaf natural process coffee. This is one of those coffees that tasted so good I just had to record my notes for later.

I used the following roast profile on the Popper*:

  1. 6:00 at 980 watts
  2. 1:00 at 1140 watts (at which it barely reached first crack)
  3. 3:00 cooling cycle

And then it rested for 8 days. The overall mass loss was 10.3%, classifying it as “first crack” according to Sweet Maria’s chart.

The resulting espresso shot was flavorful with a nice level of acid, fruity flavor, a slightly syrupy texture, and a bit of natural sweetness.
Read more…

Coffee soda, revisited

Comments

I’ve been experimenting with coffee-based sodas again. Unlike last time, I decided to experiment based on the espresso kola idea.

What I’ve found to work really nicely is to take 1 liter of cola (such as Sodastream’s generic cola flavor, which has a nice blend of sucrose and ace K/sucralose), four pumps of vanilla syrup (such as Torani), and a purposefully-overextracted shot of espresso.

For my most recent batch I did an ultra-long shot, with 18 grams in, 60 grams out, specifically to get as many of the bitter oils out as I could, which helped the coffee flavor really stand up against the sweetness of the cola.

One thing to keep in mind when doing this is that espresso is full of surfactants and particulate, which both conspire to make the soda very “angry,” so caution is advised, especially when opening the bottle for the first time. It’s a good idea to let it rest in the refrigerator for a few hours and then open it carefully in the sink.

An even better idea is to use a much larger bottle than the volume of soda you’re making, so for example a half-liter of cola, and two pumps of vanilla syrup. I’d still do an 18:60 espresso shot with that, though, for even more delicious coffee flavor.

Anyway, now to mop my floor…

Popper Is A Coffee Roaster

Comments
IMG_6800.jpeg

As much as I was enjoying my cheap home-roasting setup, the coffee I was getting out of it was a bit one-note, especially when doing processes which were easily-replicable. The best coffee I’d gotten was when I didn’t know what I was doing and was trying all sorts of random things.

After reading up a bunch more about what I was doing wrong, all conclusions were that having the popper going at full-blast from the beginning was really limiting my ability to get good, consistent, developed roasts, and after considering adding a PID controller to my popper or other means of temperature control, I decided the easiest next step would be to buy a Popper1.

Read more…

What, another grinder?! Timemore Sculptor 064s

Comments

As much as I appreciated my Sette 270, there were a few things I didn’t like about it:

  • The fine adjustment mechanism is weird and unpredictable (due to the dual-ring thing)
  • It is incredibly loud
  • Grinding for espresso usually took 3-4 cycles due to popcorning
  • The dang felt pretty huge (relative to my tiny kitchen)
  • It’s built for keeping stuff in the hopper rather than single-dosing

I was considering a number of other grinders (most notably the Option-O Lagom Mini) but then in April, Timemore announced the Timemore Sculptor series, in a number of sizes and grind profiles. And the requisite Kickstarter had it on a pretty deep discount.

So anyway, I backed the 064s (64mm stepless variant) and expected to wait.

And wait I did! But the lovely new grinder arrived today.

Read more…

Roasting coffee at home

Comments

I love the flavor of coffee, but don’t really care much for caffeine. Unfortunately, finding good roasters that treat decaffeinated coffee with respect is difficult, and the ones which are out there tend to either default to a dark roast, or cost enormous amounts.

But with a $20 popcorn air popper you can roast your own coffee at home, and save a lot of money doing it!

I’ve been doing it.

Read more…

Cascara experiments

Comments

I recently bought some Colombian EA decaf from S&W Craft Roasting, as well as their sampler pack and a bag of cascara tea. The order shipped immediately and got to me within just a few days, and I am pretty happy with the decaf.

But let’s talk about the cascara!

Read more…

My updated current espresso process

Comments

9 months ago I posted my then-current espresso process. As this is a constant experiment and processes change over time, I figure it’s time for an update:

  1. I have returned to single-dosing, and have 3D printed a single-dose hopper for that purpose. This makes it less convenient for me to rest/outgas my beans but it’s easy enough to just, y'know, open the bag while it waits in the refrigerator. Oh also I grind into the dosing cup, not direct into the portafilter, and I give the dosing cup a little shakey-shake before pouring it into the portafilter (with a dosing funnel).

  2. My dose is now 18g, and since I’m single-dosing there’s no time calibration necessary. Also, I give the beans a quick spritz with water (aka “RDT” in coffee nerd circles) to cut down on static and clumping.

  3. My leveling process is now to do a vertical tap, and then WDT, with no additional leveling. Also, for the WDT I ended up settling on a bit of cat6 Ethernet cable which I stripped down to the wires which I then straightened, forming a sort of whisk. It’s probably not food-safe, but it works.

  4. I still tamp as before, although as part of my tamping I also turn the tamper around a couple of times to ensure that the puck is flat and releases.

  5. I extract either a 1:2 ratio (i.e. 18g in, 36g out) or 30 seconds, whichever comes first, and use that as a guide for dialing in my grind.

My current espresso technique

Comments

Update: See the update to this post.

I’m still learning how to do good espresso, and my current technique seems to generate better, more repeatable results than before.

  1. Let your beans outgas before grinding them

    Inspired, as usual, by a James Hoffmann video, I’ve started doing this much more regularly after noticing that super-fresh-roasted beans keep on resulting in horrible channeling. So now when I get a new bag of beans I put it into my countertop storage and let it sit there while I finish off the previous bag.

    Relatedly, rather than keeping my current beans in an airtight container, I’m actually using the hopper on my grinder instead of single-dosing stuff.

  2. Target 15g of ground espresso

    I’ve settled on a 15-gram dose. Since I’m now using the hopper instead of single-dosing, I’m continuously adjusting my grind timer; I first tare my scale with the dosing cup, then put the dosing cup under the grinder, run it for my set time, then weigh the ground beans and then adjust the timer based on targeting 15 grams (for example, if my grind time is set to 4.5 seconds and I get 13 grams ground, I adjust the timer to \(4.5s \times 15g/13g = 5.19s\)), and then also grind a bit more until I get to 15 grams. If my initial grind was too much I just go ahead and use a larger dose.

  3. Sideways-tap level, then WDT, then sideways-tap again

    I’m no longer using the spinny-spinny leveler, unless I’m having a really difficult time getting the puck level before tamping. I am using a WDT for declumping. I’m still using the crappy WDT but I will someday get around to printing one of the acupuncture-needle ones that everyone’s in love with now.

  4. Calibrated tamper, but go extra

    Instead of trying to get a precise pressure-based tamp, I’m using the calibrated tamper by Decent to indicate the minimum force to pack it down by. Apparently it’s easy to undertamp a puck but pretty much impossible to overtamp, and the depth-based tamping I was doing before was way too inconsistent, especially when using lighter roasts (which tend to grind denser).

    (If you don’t want to pay the premium for the Decent tamper, this one on Amazon looks pretty okay.)

  5. Extract based on time, not ratio

    This is a thing that’s made a huge difference to the quality of my output. Instead of targeting a 1:2 in:out ratio and adjusting the grind to get it closer to 25 seconds, I brew for 25 seconds and then adjust the grind to get it closer to a 1:2 ratio. Extraction time is the primary driver of flavor profile, and a 25-second extraction seems to get pretty close to the peak. So if my grind is too fine I might get a 1:1 ristretto, or if it’s too coarse I might get a 1:3 lungo, but either way I’ll end up with some pretty good-tasting espresso (although a lungo will tend to be a bit more bitter than I like).

Read more…

My (current) coffee station

Comments
IMG_3534.jpeg

For the last few months (since mid-July) I’ve been going through a lot of upgrades and troubleshooting on my coffee setup, especially as far as espresso is involved. I’m finally at the point where I’m happy with both the equipment and technique I have… or at least I think I am.

Here are the products I currently use, and the techniques I’ve found to get the most out of them. As usual, I have affiliate links for many of the products on display, but feel free to search for the best deal or the vendors you prefer.

Read more…