Even more VRChat tips and tricks
I’ve been completely redoing my avatar from scratch and this time around it’s turned out great!
Anyway now that I’ve learned more about Blender and VRChat in general I have a bunch more stuff to share since last time. (And some of this will apply to Unity in general too! Sort of, anyway.)
VRCFury makes life a lot easier
One of the things I like to do is set up overly-complex material changes on my critter. This makes things incredibly difficult when trying to manage PC vs. Quest versions, though, because material changes have to be implemented as both a material and as an animation which applies it, and you only get one animator layer for that stuff (which has to share state with a lot of other things).
Thankfully, VRCFury exists and makes this a lot easier. To use it, you add a child GameObject to your avatar with the VRCFury component on it, and from there you can add more layers for animators, menus, and so on, which get automatically composed in at build time. So, for my materials, I have two animators, one for PC and one for Quest, and it also exposes the necessary parameter. So now I only need to make sure that my material ID matches between the two platforms.
I’m also going to make a sellable base mesh version at some point, and to that end I’m also separating out the menu into its own thing, so that I can provide a standard material set for the purchasable version and my own set of animators for my personal version.
The original reason I even learned about VRCFury was that this was something that my friend Micca pointed me to for adding wings to an avatar I was working on for a friend, and from there I also learned that it makes setting up GoGo Loco way easier as well.
So, yeah, if you’re doing any sort of complex avatar customization (or even simple stuff!) I highly recommend VRCFury. It makes life so much easier.
A really good Blender tutorial
The assortment of Blender tutorials I learned from were great for the basics, but what I really needed was a good guide for how to do some aspects of topology. Thankfully, I came across this really good tutorial on building a humanoid mesh, which includes some really great tricks on how to do things like knee/elbow topology, which also maps really well to other body parts!
It’s definitely worth a watch, especially after you already have the basics of Blender modeling down.
Facial control gesture things
On this avatar I decided to set up hand-gesture-controlled facial animation, which makes it a lot easier to express myself in-world. There are two things that are pretty difficult to find information on, though: blink overrides, and visemes overriding facial gestures.
Blink overrides are important because if you have a gesture which manipulates your eyelids, your automatic blink animations will be in addition to that, so if your gesture, for example, closes your eyes, your eyelids will periodically go even further down. Which looks very, very wrong. Fortunately, the fix to that is pretty straightforward; on your animator states, add a “VRC Animator Tracking Control” behaviour, and set Eyes & Eyelids to “Animation” for ones which you don’t want blinking to occur during, and “Tracking” for ones where you do (including the idle state).
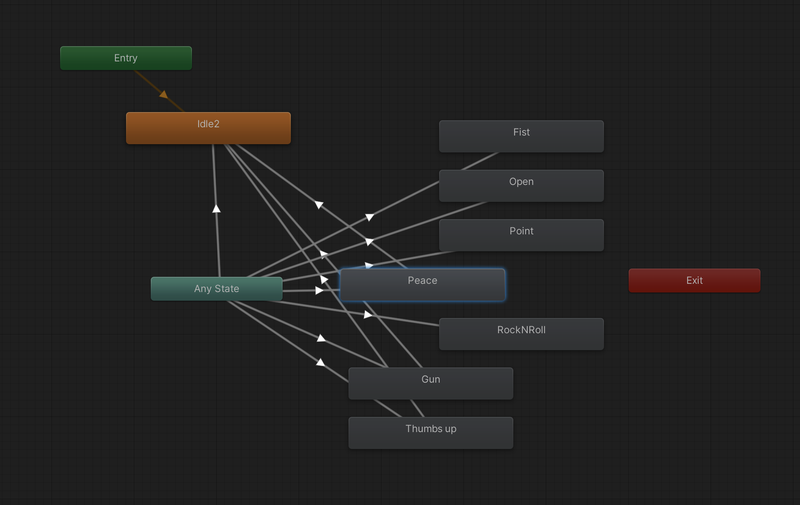
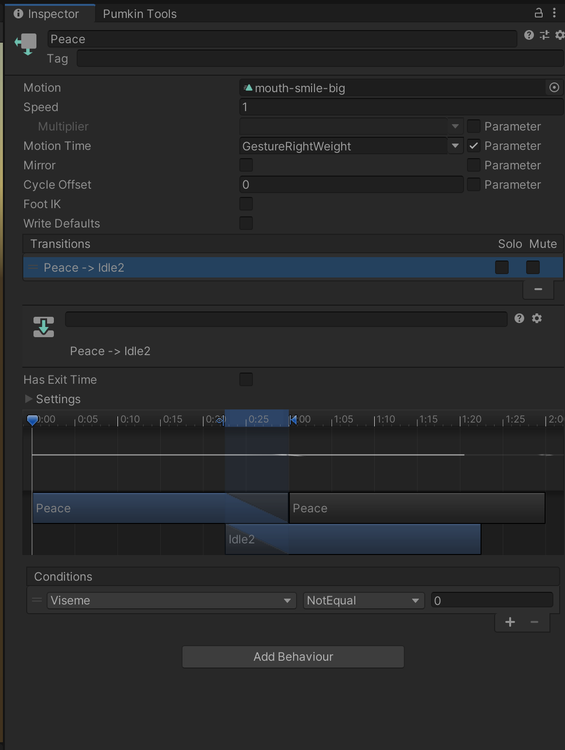
Viseme overrides are a little less straightforward, and all of the information I could find out there was for having a gesture override visemes (which is the opposite of what I want); basically, if I have a viseme that opens my mouth (such as a slack-jawed or grinning expression) I want speech to override that, so that the mouth shape doesn’t mess up the viseme animation. To do that, you again edit your animation controller, namely adding “Viseme” as an animator parameter, and then on the animation layer, do the following:
- On the transitions from idle to gesture, add a condition for “Viseme Equals 0”
- On the gestures that have this set, add a transition back to idle with a condition of “Viseme NotEqual 0”
On my animation controller I like to outdent the nodes that require this stuff to make it easier to see which ones need this extra transition; in this example, “Peace” “Gun” and “Thumbs up” have viseme-incompatible gestures:
A texturing workflow for folks who don’t like Substance Painter
I am extremely not a fan of Substance Painter. Even without having been acquired by Adobe, I find the interface to be incredibly cumbersome and regressive, and the fact that it only supports a layered export workflow into Photoshop doesn’t help matters at all. So I prefer to use other tools.
In particular, I’ve settled on Blender’s Texture Paint mode and Krita as a glorified compositor!
Blender Texture Paint, unfortunately, doesn’t have any built-in concept of layers. So instead, what I do is make a bunch of separate alpha mask textures there; for example, to do my plaid lines, I made a layer for one direction of them:
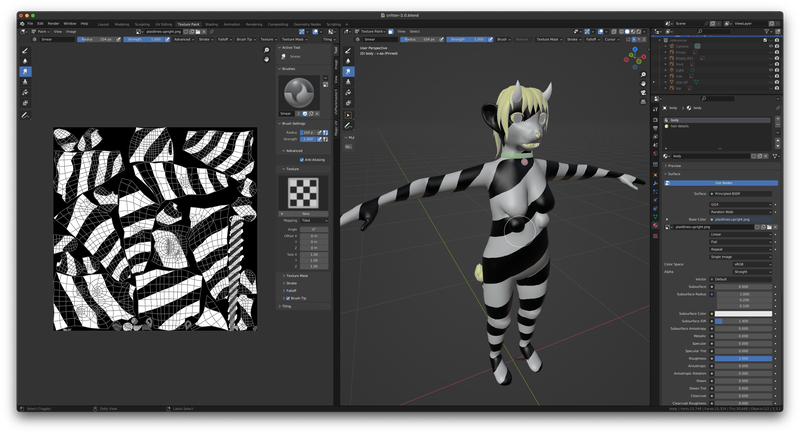
and then I imported it into Krita as a layer, as well as my UV layout as another layer on top of it. Then I used that as a guide to use Krita’s transform tools to mirror them around (which is, unfortunately, not something that you can do trivially from any tool that I know of — it’s actually a computationally difficult problem!). Then I brought the mirrored one into Blender to tweak the alignment in some spots (since the mirroring wasn’t perfect and a couple of my UV groups weren’t quite symmetrical for some reason). Now I had two mask layers, which I brought into my master texturing file in Krita, and which I use as transparency masks on fill layers for the different directions of plaid lines.
EDIT: Piko Starsider pointed me to Blender’s Quick Edit function which could have made the plaid line mirroring process much simpler; basically, after drawing the plaid lines in one direction, in principle you could use Quick Edit and then mirror the texture in camera space. You’d probably have to do it from a bunch of different angles to get the best coverage, but it’d probably be a lot easier than the mirroring-in-UV-space approach I took. Definitely something to remember for next time.
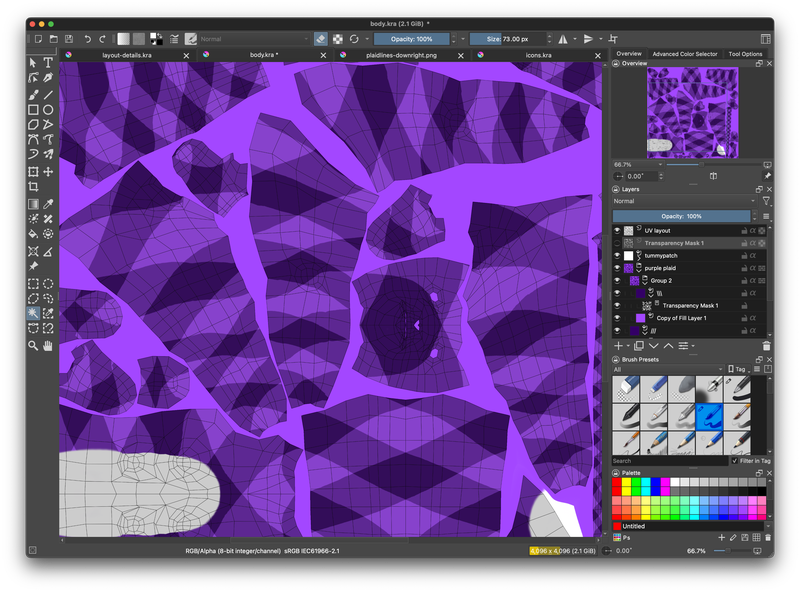
Similarly I also used Blender to make the tummy patch layer (which you can also see in the screenshot above).
Now, there’s one problem with this workflow (or really any workflow that works in UV space): texture seams! Specifically, when a texture gets scaled down (which is approximately most of the time), there can be some bleed from the texels outside of the mapped areas into the actual render. But there’s a fairly straightforward fix for this: inpainting! For this, Blender Texture Paint comes to the rescue again; what I do is make a fully-white texture in Blender, and then use Texture Paint mode to color all of the mapped texels black:
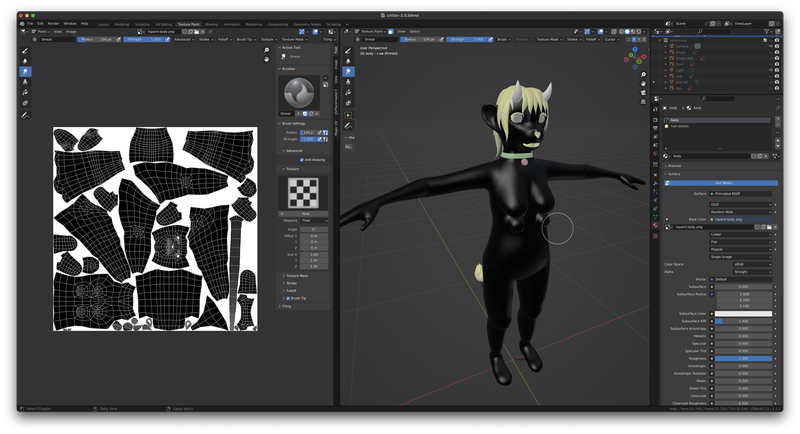
and then whenever I save out my texture from Krita, I run a script that applies OpenCV’s inpaint process to it. First, here’s my inpainting Python script (which runs in a poetry environment with opencv-python installed, although if you’re less anal than me you can just pip install opencv-python and call it a day):
import cv2
import argparse
import logging

parser = argparse.ArgumentParser(description='inpaint an image')
parser.add_argument('infile', type=str, help='Input image')
parser.add_argument('maskfile', type=str, help='Mask image')
parser.add_argument('outfile', type=str, help='Output image')

args = parser.parse_args()

print(f"Loading {args.infile} and {args.maskfile} -> {args.outfile}")
infile = cv2.imread(args.infile)
maskfile = cv2.imread(args.maskfile, cv2.IMREAD_GRAYSCALE)

print("Inpainting")
out = cv2.inpaint(infile, maskfile, 3, cv2.INPAINT_TELEA)

print(f"Writing {args.outfile}")
cv2.imwrite(args.outfile, out)
and here’s a shell script I run to apply the inpainting to all of my textures in the appropriate directories:
#!/bin/sh
# inpaint the various textures

for src in avatars/Assets/Critter/Textures/body/*.png ; do
    if case "$(basename "$src")" in
        _IP.*.png) false;;
        *) true;;
    esac; then
        MASK=texturing/critter-2.0/inpaint-body.png
        OUTFILE=$(dirname "$src")/_IP.$(basename "$src" .png).png
        if [ "$src" -nt "$OUTFILE" ] ; then
            poetry run python inpaint.py "$src" "$MASK" "$OUTFILE"
        fi
    fi
done

for src in \
    avatars/Assets/Critter/Textures/details/*.png
do
    if case "$(basename "$src")" in
        _IP.*.png) false;;
        *_MochieMetallicMaps.png) false;;
        *) true;;
    esac; then
        MASK=texturing/critter-2.0/inpaint-details.png
        OUTFILE="$(dirname "$src")/_IP.$(basename "$src" .png).png"
        if [ "$src" -nt "$OUTFILE" ] ; then
            poetry run python inpaint.py "$src" "$MASK" "$OUTFILE"
        fi
    fi
done
This process results in nice clean inpainting between the texture islands:
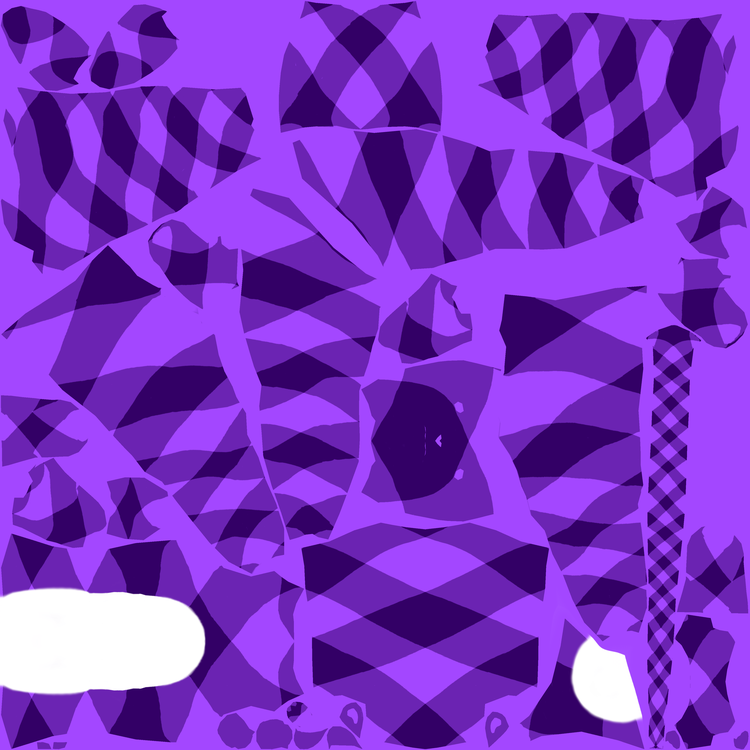
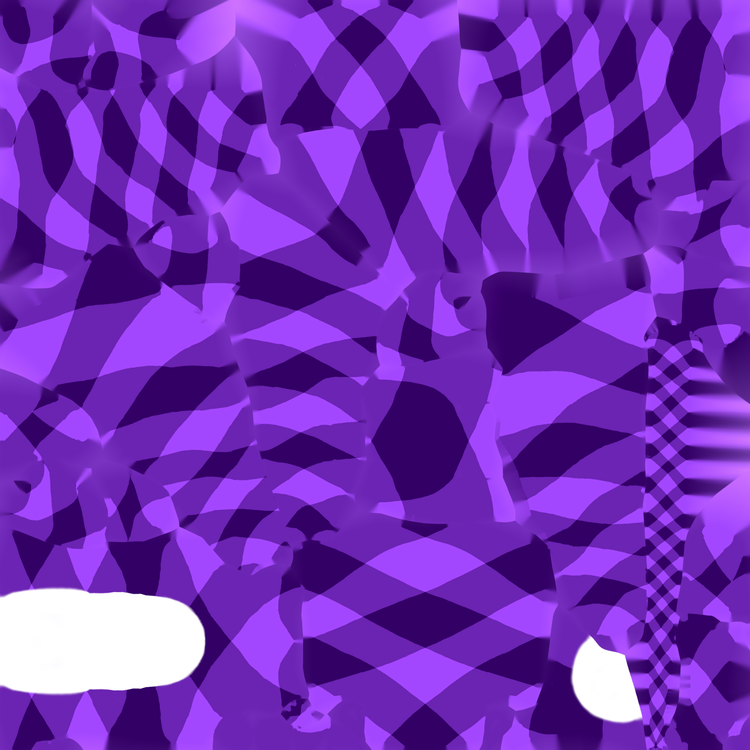
which pretty much eliminates any downscale artifacts which occur in normal operation. (There are still some extreme cases where this might not completely eliminate texture seams but in those cases they’re not likely to be visible, and this unfortunately is one of those things that can’t be 100% perfect in the general case for reasons that are sort of complex to explain but basically it’s due to how mipmapping works combined with how efficient texture packing works.)
Anyway, this mask-and-inpaint approach works really well for me, and while it’s kind of difficult to set up (especially if you aren’t a Python nerd like me), the results (and freedom from expensive proprietary software) are well worth it.
Of course, in this setup it’s important to use the _IP.* variants of the images rather than the original ones.
That said, Substance Painter seems to deal with this stuff for you automatically and that might make it worth it for folks who can stand Adobe software.
Anyway, I use this basic workflow for most of my texture work now, including adding details (such as color streaks in hair) and shading layers and so on. It’s a little cumbersome but it gives me the kind of control I want.
EDIT: I’m finding it easier to just run the inpainting on the individual masks before importing them into Krita, and then not having two separate texture versions to manage.
What to expect with my for-sale base avatar
At the moment I’m planning on selling the critter avatar with my full set of body shape customizations and with a simplified material setup with a couple of color schemes and some base materials, for both PC and Quest, and a guide on how to add more. The color schemes will not include plaid, because plaid is very much a Me thing, but I’ll probably have a solid color, some sort of fabric pattern like paisley or leopard print or something, and maybe zebra stripes (which is also a Me thing but not one that I’d mind other people using). As far as surface materials go, I intend to have skin, latex, vinyl-glitter, and metal; here’s my plaid color scheme in each of those, for an example:
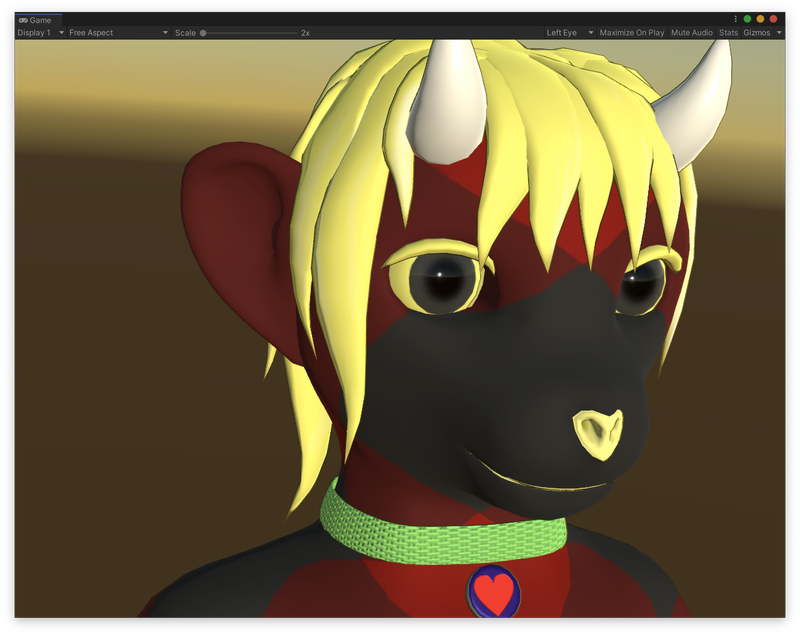
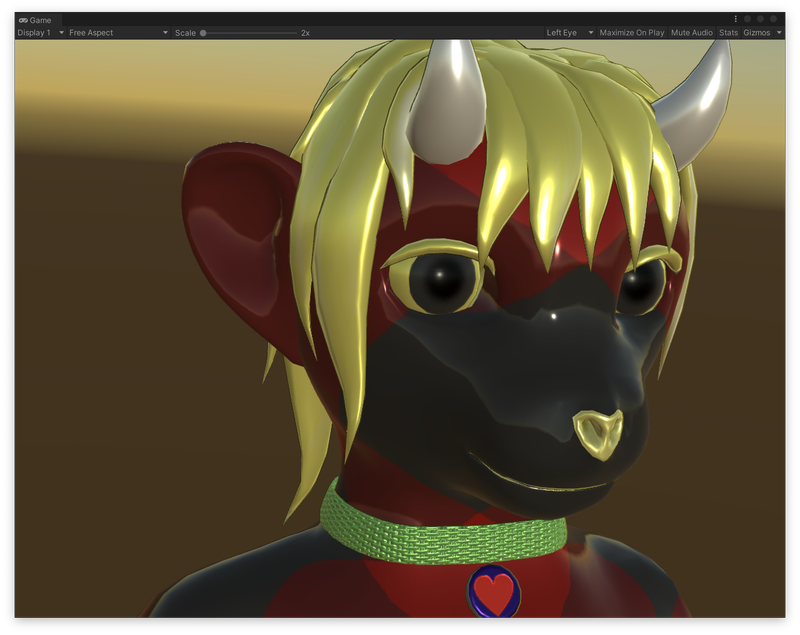
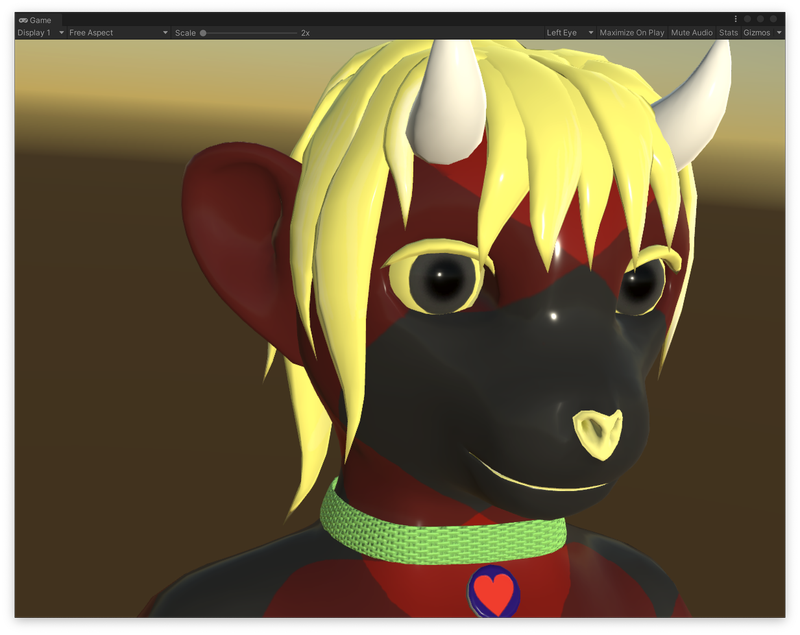
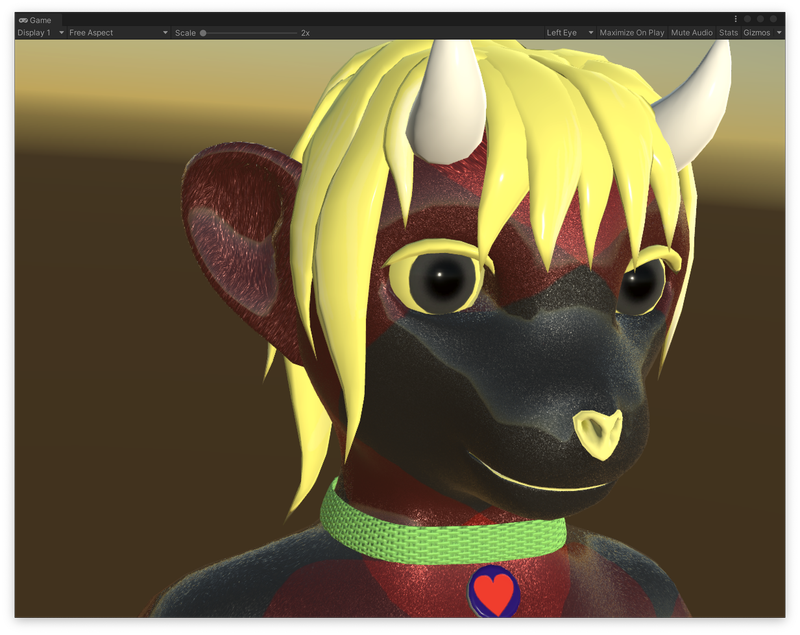
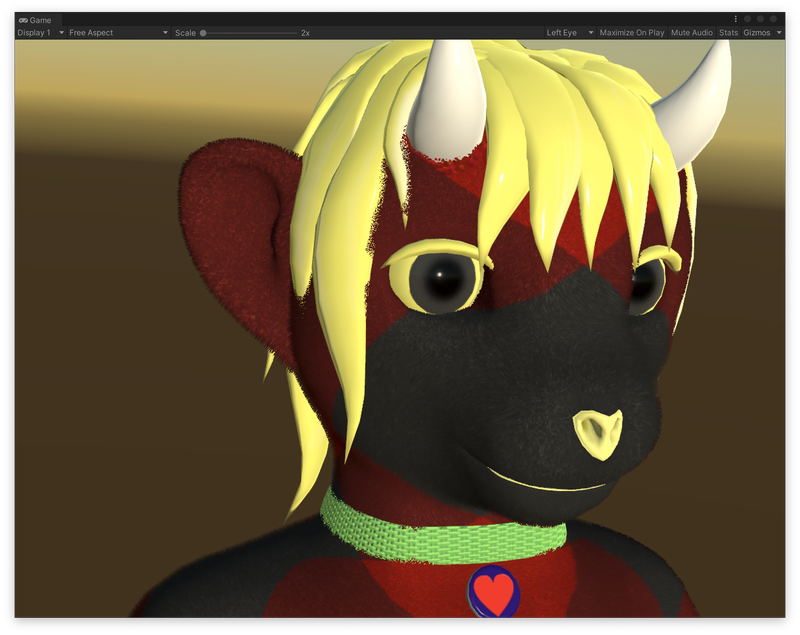
Most of these are using the free version of Poiyomi; the plush uses the free version of Warren’s Fast Fur Shader (and will work with the better-looking paid version as well, of course). Both will need to be installed by the user ahead of time, I think.
Of course, the Quest version isn’t able to look quite as nice since Quest doesn’t allow custom shaders; here’s how the glitter looks there, for example:
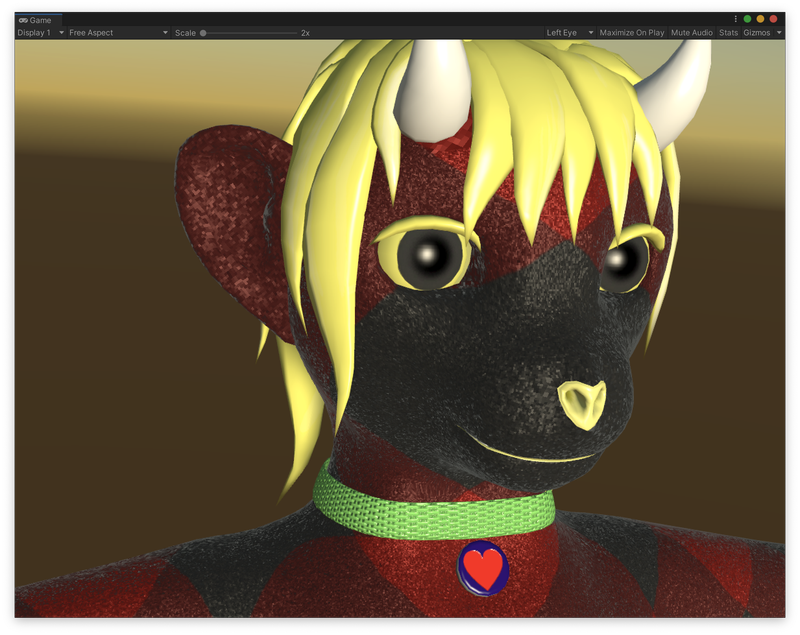
It’s close enough, at least. Just not ideal. But, such is life on a relatively-low-performance mobile platform. I’m just happy that I’m able to have most of my avatar features appear while maintaining a medium performance rank!
Anyway I might also provide the additional transparency masks as an addon or something. I’m really proud of how I made the plaid work, in particular! I just don’t want people to look exactly like me by default.
Comments
Before commenting, please read the comment policy.
Avatars provided via Libravatar