épuisé
Has it really only been three days since my last random updates post? It feels like longer.
Well, here’s some more random unstructured updates.
Rambles that are fluffy, by fluffy
Has it really only been three days since my last random updates post? It feels like longer.
Well, here’s some more random unstructured updates.
I feel like I need to come up for air, after some protracted busy-ness (not to be confused with business, which I have none of at the moment).
how the fuck was this amazing parody of 2020s tech trends made in 2013
Just a random undirected ramble.
The plan went pretty much according to keikaku1.

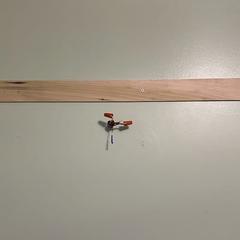
I had difficulty finding the studs because there’s some particleboard behind the drywall for some reason. Maybe some half-assed attempt at a moisture barrier or something? It was pretty obvious that it was there since it was visible through the light wiring hole. I ended up using some neodymium magnets to locate some drywall screws and then verified it by drilling pilot holes. I’m not absolutely certain that they’re screwed into studs but there’s a lot more support than there was before, and those screws are at least held tight to the wall.
On the left anchor I thought I’d messed up and that there actually was a stud behind it, somehow, and I started to patch it up so that I could screw in a construction screw instead (which is why there’s plaster on the left hole in the first picture), until I remembered, oh yeah, there’s weird backing board behind some of the drywall. So I drilled a smaller pilot hole and, yep, it went through easily, so yeah, it needed an anchor after all. (I mean I already knew that based on what had happened previously, but, still.)
Also I couldn’t find the nice toggle anchors I’d bought a couple years ago, so I ended up buying some similar ones at Home Depot. Which aren’t nearly as nice. A couple of them ended up breaking off and falling into the wall, and they were just kinda not-great to work with in general. But they did their job, and everything’s tightly screwed down.
Leveling the cabinet was a pain in the ass. It’d have been a lot easier if I had someone to help me but I was being stubborn about just getting this done.
Also, I didn’t need to do any painting, as all of the paint damage happened to be behind the cabinet. Nice.
Hopefully this time it stays up for more than two years!

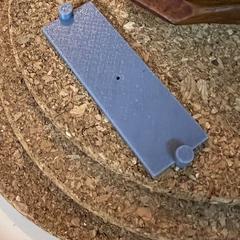
Also I decided to be fancy and whipped up a custom centering jig to draw the centerline for drilling the holes in the hardwood. It was absolutely overkill but it didn’t take me long to do. I’ll probably post it as a customizable object on thingiverse/printables or something.
Remember how two years ago I got my bathroom remodeled and it turned into a ridiculous ordeal that lasted well over a month of me living in a hotel and, later, a temporary apartment due to the repeated incompetence of the workers involved? And then it eventually finished up and it was good enough? Aside from some later issues which were easily fixed by myself?
So, about that…
So hey, the Bandcrash GUI is finally, finally in a working state! You can now use it to easily encode a bunch of wav files into mp3/ogg/flac and make a web preview, and optionally upload it all to itch.io automagically!
Also, I’ve released prebuilt macOS and Windows binaries over on itch.io. I’ll probably do a Linux version as well at some point, although Linux users are likely much better-equipped to just build-and-install it themselves.
To that end, I used it to upload one of my older albums to itch, and I gotta say, having a GUI to set it up is actually a lot nicer than doing it all from the CLI with hand-written JSON files? Weird.
There’s still a lot left to do on it but what is there right now is Good Enough for now.
That said, I’m hopeful that bandcamp remains viable for the long term, but now it’s a lot less necessary to worry about a single platform like that.
I’ve made a bunch of progress on the GUI for bandcrash! After a bunch of false starts trying to figure out the “easy” and/or “right” way of doing things, I ended up just doing things the kinda-boneheaded way, using Qt and way too much stateful boilerplate. I figure that Working is better than Nonexistent, and someone who’s better at GUI shit than me could probably come along and improve things later.
I finally replaced my blood sugar meter and, after verifying the new one’s calibration, my blood sugar is back to normal-ish, which is to say, 110 mg/dL after waking up, which is still “prediabetic” but not even remotely “go to the hospital.”
I’m not sure if it’s the meter or my test strips which were bad, but either way doing a refresh on the whole kit was a good idea, especially since I only do occasional testing. The included sample strips and test fluid always last me way longer than the “discard after” time, and I also was never great about closing the test strip vial after taking one out (which I guess can affect the chemistry), and given how infrequently I need to test, it just makes more sense for me to buy a new test kit bundle when I need to.
I wonder what the useful lifetime on a blood glucose tester is supposed to be, anyway. They sure seem to be made to be disposable. (But also that’s probably a function of how they work to begin with. Reagents always degrade, as do chemical detectors.)
But at least we can take blood sugar off of my immediate list of concerns.