Remote Build & Test support for VRChat avatars
Sometimes you need to be able to build and test an avatar from a different machine than what’s running VRChat. This can be a bit tricky. I finally figured out how to make the process less-awful.
I do most of my 3D work from a Mac, but there is currently no native Mac client for VRChat, and I’ve been unable to get it working under Wine or Crossover. Even if I did get that working, there’s no chance of getting VR headsets to work that way.
So, using VRChat’s “Build & Test” function is a little tricky — but it’s doable!
Setting up file sharing
First, on the machine that runs your VRChat client, press Win+R (or click on Start and select “Run”) and type: %UserProfile%\AppData\LocalLow\VRChat\VRChat\. This will open up an Explorer window showing a bunch of other folders.

Right-click on Avatars, select “Show More Options…” and then “Properties.”


Go to the Sharing tab, then click “Share…” and add your user to the list and click the “Share” button.


Next, back on the properties window, click “Advanced Sharing…”, then “Permissions,” then “Add.” In the “Enter the object names” text area, type your username, then click “Check Names,” which should complete your username to the full sharing name of the user (usually COMPUTERNAME\username).
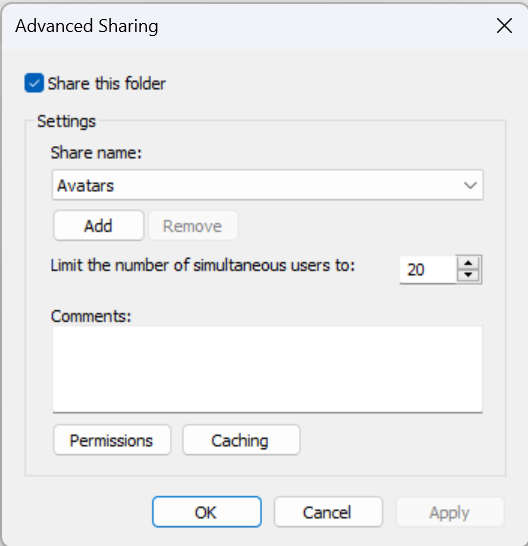


Finally, back on the permissions window, select your username and check the “Allow” box for “Full Control.”

How to build-and-test
On your computer that you run Unity on, from the SDK panel select “Build & Test.” After it works for a little while, it should pop up a dialog box saying “Test avatar built” or similar (or, on newer SDK versions, simply give a completion message in the control panel).
Now, you’ll need to find where the actual .vrca file is kept. On macOS this will probably be in ~/Library/Application Support/VRChat/VRChat/Avatars (go to Finder and press Cmd+Shift+G to open the path entry thing to be able to navigate there). On Windows it’ll be %UserProfile%\AppData\LocalLow\VRChat\VRChat\Avatars. I have no idea where it’ll be on Linux.
Open up your network sharing, connect to your VRChat machine, and open the “Avatars” share.
Finally, copy your locally-built .vrca file to your VRChat machine. Then from VRChat, go to your Avatars, then “Other,” and your test avatar should be right there, appearing as an “SDK” avatar.
Comments
Before commenting, please read the comment policy.
Avatars provided via Libravatar